How to Clean Hardwood Floors To Truly Last
We’re not just going to sit here and tell you how to clean hardwood floors. You’ve seen the yogurt spills, the mud tracks, the dog piddle, the spilled milk…
You KNOW the wear and tear. You’ve lived it, and you’ve certainly cleaned it, any type of way you could (unless you’ve lived with carpet your whole life, then that’s a different story).
But while you know how messy your floors can get and you have your own cleaning routine, we’re here to get into how to clean them so thoroughly they’ll sparkle and shine.
We’ll start with the daily clean, because you might actually be damaging your floors and not know it. Then, we’ll get into natural cleaning methods, cleaning with vinegar, and deep cleaning (the kind of cleaning you do once a year).
Three steps to cleaning your hardwood floors regularly
You’re pretty familiar with sweeping your floors after dinner with your regular cleanup. Or maybe you sweep up after every meal (well, aren’t you a keeper).
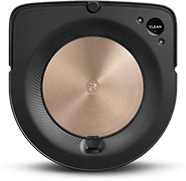
Maybe you have a Roomba® robot vacuum that handles it all for you, so you really never have to think about sweeping or vacuuming at all (or all the pet hair that accumulates on your floors).
No matter your routine and regularity in cleaning your floors, you might have to give it that extra mop once a week (or a couple times a week if you have kids, pets, or you’re just a sloppy cooker – we’ve all been there).
Map out your home cleaning to-dos with a checklist that you can adjust to your needs:
A House Cleaning Checklist for Each Room, by Day, Week, and Month
For a quick and regular (but extra) cleaning, you need only remember these three steps:
Step 1: Sweep or vacuum your floors first

Essentially, just sweep your floors as you normally would (a dust mop works too if that’s what you prefer), making sure to get into those corners and entryways, under the fridge as much as you can, and under area rugs.
If you have a vacuum cleaner designed for use on hardwood floors (and carpet), such as a Roomba® robot vacuum, then even better. If you let it roam through your home, it’ll be sucking up dirt, debris, and pet food regularly, reducing effort on your part (hey, isn’t that fun).
Step 2: Mop your hardwood floors
Most of us have our own methods of mopping, whether it be a big bucket with a traditional tassel mop that you have to wring out, using a spray mop with microfiber pads, or pouring warm water with dish soap on the floor (just remember not to leave it long; standing water will deeply damage floors) and soaking it up and scrubbing with a dry mop (we’ve seen a thing or two).
While there’s really no wrong way to mop, there are a few caveats.
One, you might want to alter your mopping method depending on your type of flooring. Most vinyl floors can handle a ton of wear and tear (including chair scraping and knife drops), but some might not handle a lot of water too well.
Hardwood floors that aren’t regularly sealed, have gaps between planks, or aren’t waterproof may warp or bubble if there’s excess water. For regular cleans, you’re generally fine with a quick spray microfiber mop.
Another thing to note, is that most hardwood floors are sealed and you can wear that seal away over time and with cleaning tools like a scrubber or abrasive cleaning solutions.
Always pay attention to the cleaning recommendations of your hardwood flooring retailer or hard floor manufacturer (if you’re installing them).
If you have no idea how to clean your specific type of hardwood vinyl flooring, our guide on how to clean vinyl floors might be of help.
Learn how to clean vinyl floors so they sparkle.
Step 3: Seal your hardwood floors
You’re probably not too familiar with sealing your hardwood flooring. Don’t worry, most people aren’t.
But since most of us aren’t told to do so (it’s not really a common cleaning task), we never do, which leads to duller looking floors, more scuffs, scratches, and bubbles.
Frankly, without sealing, your floors just don’t look as good and they won’t last as long.
How do you seal hardwood floors?

If you do have real wood floors, the process of resealing can be as extensive as sanding them down, re-staining them, then adding polyurethane to seal them (though you can add an additional layer of sealant on top).
Now, all that really depends on the shape of the floors and how stained and scratched they are. With proper care, hardwood floors can last decades with a simple layer of sealant applied with a microfiber cloth mop.
You won’t have to sand your vinyl flooring, and it’s generally not possible to do so (the printed vinyl layer that makes it look like wood is rather thin).
But, adding a refinisher or floor sealant specifically made for vinyl flooring is recommended for long-term maintenance of your hard floor.
(If you are considering sealing your hardwood floors DIY, please consult your floor manufacturer’s recommendations and your local flooring professional to determine the best options for your specific floor type.)
Why do you need to seal vinyl hardwood floors?
Vinyl flooring may be low maintenance, but they still get gaps between the boards. Without sealing them, you’re going to get grime and debris (and various liquids) between the planks, building up, shifting the boards, and potentially ruining your entire floor.
So you absolutely should seal them (according to your manufacturer’s recommendations, of course).
How often should you seal your hardwood floors?
Simple answer: every 3-5 years.
The best way to know whether they need a seal, is to pay attention to:
- The gaps between the planks
- The shine of your flooring
- Whether water beads or sinks into planks
- Your floor manufacturer’s specifications
How to deep clean hardwood floors
Part of the appeal of vinyl wood floors are the grooves and textures that give it a more natural look. And, of course, natural wood floors will have just as much appeal, if not more.
The problem with those grooves is that they trap dirt and grime in ways that a completely flat surface wouldn’t.
The buildup starts to discolor your flooring, often making it much darker than it really is and eliminating that appealing texture.
To help get rid of buildup on your hardwood flooring, use an agitator brush or brush attachment on a vacuum or wet mop (just make sure the bristles on the brush aren’t too hard. Excessive scrubbing over time will wear away the seal and finish).
In almost every case of deep cleaning for hardwood, you’ll have to agitate the dirt and buildup. It can’t come out of the groove without some kind of scrubbing motion with detergent or intense heat.
Ready to automate some chores and take things off your to-do list?
Check out our blog:
How to remove scuffs and stains from your hardwood floors
That said, the number one solution you’ll hear across the internet (even flooring companies will share this advice) is to use hydrogen peroxide (just make sure to dilute it and wear gloves).
Whether it’s a water stain, pet stain, that green juice you’re trying for your New Year’s resolution (don’t ask), hydrogen peroxide is a great way to get it out of your flooring.
If you don’t feel comfortable using hydrogen peroxide on your flooring because it’s pretty acidic and you’re worried it’ll ruin the flooring, there are other products such as wood bleach (especially great for pet stains).
For water stains, there are water mark remover solutions.
Because many of these cleaners are acidic to cut through the stain, they’re also likely to lighten your floor stain (aka floor color). So you’ll get rid of the dark spot, but end up with a lighter patch on your floor.
This won’t always happen, but it’s a good idea to lightly sand the spot, restrain, and seal your flooring again. This may be a challenge if you can’t match the stain.
At the very least, apply a floor finish and sealant to avoid further staining.
For scuff marks:
You can simply rub the area with an eraser or scrub the area with a dry, clean cloth.
How to clean hardwood floors with vinegar
Cleaning hardwood floors with vinegar is as simple as using white vinegar as a cleaner rather than other cleaning products:
- Fill a bucket of water
- Add a tablespoon of vinegar to the water (if you keep the water’s volume low, add more if you have a large area to cover and use a lot of water)
- Add a drop of dish soap (optionally, you can also add a bit of lemon or lavender essence if you’d like to counteract the smell of the vinegar)
- Drop the mop head into the water and mop as usual
Vinegar is an acidic agent, but it’s generally safe enough on most hardwoods and will cut through most types of grime while eliminating any scents.
It will also aid in stain removal for minor messes caught immediately.
Using Bona to clean wood floors
Bona is one of those hardwood floor cleaners that leaves that nice, polished sheen on your hardwood, like it’s been freshly buffed and polished by the local janitor.
Using Bona is slightly different than it would be for a typical mopping solution that you’d add to a bucket.
You can dilute bona floor cleaner in a bucket of water, by the way, but it’s advised you use a spray mop to reduce the amount of overall liquid on your floor (and because you don’t need that much solution to achieve sparkling floors with Bona).
Here are the easy steps for use:
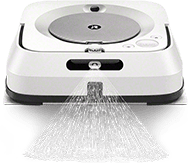
- Add Bona floor cleaner to your spray mop or Braava® robot mop (we’re compatible! Oh, what a match).
- Spray and mop as you normally would with another solution, back and forth with the grain of your flooring.
- Use a dry microfiber pad or paper towel on your spray mop head to wipe up any excess as you go.
What kind of cleaners should you avoid?
Generally, you should steer clear of anything too acidic or abrasive. Both will wear away the sealer and stain, making buildup of dirt and grime far more common / easier and wear away your floors much faster.
Should you use wood floor cleaner and polish?

Frankly, it’s a good recommendation. These cleaners are meant to polish and clean your floors without the slippery action of things like dish soap. And without the potential for streaks and residue of acidic cleaners like vinegar.
These cleaners and polish are also formulated to help your floors last longer. Without the potential for wearing away their enamel or color.
Just remember, polishing your floors frequently may cause some buildup over time, which you should deep clean every other year (up to every 3 years). The buildup of wax on your floors can cause them to get hazy otherwise.
How do you clean and shine hardwood floors naturally?
So, again, this can vary depending on your floors. If you have natural hardwood floors that’ve been in the home for decades, or even vinyl that’s been in the home for 20 years… it’s never going to shine as well as new flooring (sorry).
At least, not without being sanded down and refinished, if that’s possible or recommended for your specific floor type.
If you want to avoid things like chemicals on your floors (babies do love to crawl on them, and dogs love to eat off them), then vinegar is probably your best friend.
How to maintain your hardwood floors
Cleaning heavily soiled hardwood floors may only be a semi-annual or annual task. (Ain’t Spring cleaning fun?) Your floors need regular mopping about once a week depending on your lifestyle.
Yeah, it’s no fun sitting by your sink to refill the water bucket while rinsing out your sponge mop, but if you want a clean floor, it’s all a bit hard to avoid (well, you could always get a Braava® robot mop to handle the mopping for you).
If you want to maintain your hardwood floors for the long-term, there are a few key things to remember and do (or don’t do):
- Don’t use abrasive or acidic cleaners, or hard brushes as they’ll eat away at your floors
- If you use floor polish, you will have to remove the floor wax every other year or so to keep that same original finish and color of your floors
- You should seal your floors every 3-5 years with a sealant specifically designed for your type of flooring (whether it’s vinyl or real wood)
- Sweep or vacuum your floors before using a damp mop (even the best mops will otherwise push around the debris and may even embed it into hard to reach places and grooves)
- If you steam clean your floors, limit this to 1-2 times a year to avoid wearing out the finish or the boards (especially if they aren’t sealed)
- If you have a lot of floor to cover, cleaning small sections of your floor is usually much easier to manage at once (Don’t feel like you have to get them spotless all at once.)
- Bonus: use furniture pads (aka floor protectors) to keep your floors free of scuffs and scratches
Regular sweeping and mopping just got a whole lot easier
So… how do you clean dirty hardwood floors?
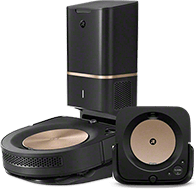
Regular sweeping and mopping (thanks, iRobot), the occasional deep cleaning and buildup removal, and a regular sealer should do the trick. As long as you understand what kind of flooring you have, and what kind of tolerance it has to your preferred cleaner and methods, you’re on the right track.

